

Version 7.2 and higher for clients Version 7.4 and higher for locations
Multiple contact persons can be created for both clients and locations. Each contact person can be given a type, such as ‘GP’, ‘mother’ or ‘concierge’.
Required
- User right 12.1: ‘Allow editing of location information’, for location contact persons
- User right 6.10.1: ‘Contact persons: adding and deleting’, for client contact persons
Fill in contact person information
From the contact persons overview, the ‘Add’ button can be used to define a new contact for the selected client or location. To create a new contact person for an imported client (from version 7.5 onwards), ‘Contacts’ must be checked explicitely in setting 33.
On the page ‘Add contact person’ all information for the new contact person can be entered. The page is divided into 5 sections. Fields marked with an * are required.
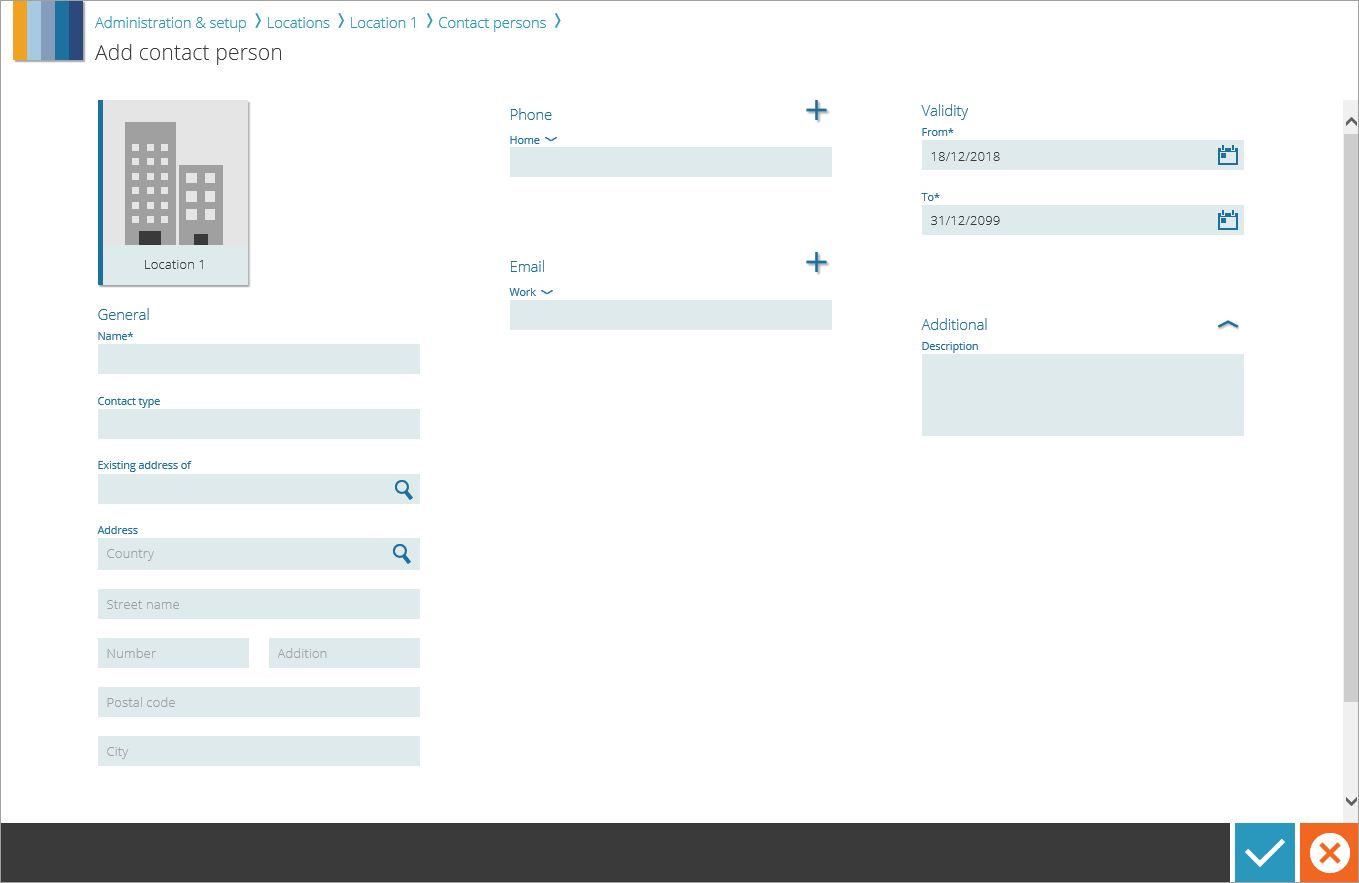
1. General
- Name*: Enter the name of the contact person here.
- Contact type: A contact type can be entered here. This can be used to indicate the relationship with the client or location, for example the client’s ‘Brother’. Previously used contact types will be shown as suggestions in a list when typing in the field.
- Existing address of: With this search field you can search for a known location, client or employee. The address of that found resource is then used as the basis for the address for the contact person. All address fields are filled in automatically. If needed, the address facts can be changed or supplemented before confirming.
Tip
This is a useful feature when for example the client’s contact person lives in the same house as the client himself (the parents or partner of). In this case select the client in the ‘existing address of’ field. The address does not need to be re-entered in this way.
- Address: Here the address of the resource selected above is displayed, or a completely new address can be entered. If it concerns an address in the Netherlands and a postal code table is installed, then entering the postal code+house number is enough. The street name and the city are automatically filled in.
2. Telephone
By clicking  it is possible to add an (extra) phone number. By clicking on the label with the arrow you can choose a different type for the phone number. By default the type ‘Work’ will be selected.
3. E-mail
By clicking it is possible to add an (extra) e-mail address. By clicking on the label with the arrow you can choose a different type for the e-mail address. By default the type ‘Work’ will be selected.
4. Validity
- Valid from*: The date from when this contact person applies. When creating a new contact person, this field is filled in with the current date by default.
- Valid until*: The date until this contact person is valid. When creating a new contact person, this field is set to 31-12-2030 by default.
5. Additional
- Description: By expanding the ‘Additional’ section with the arrow, an additional description of the contact person can be added.
Save contact
After all mandatory data have been filled in, the contact person must be saved with the  button at the bottom right. The very first contact added to a client or location is automatically pinned (marked with a
  ) and displayed on the client’s dashboard or location when saved. This can of course be changed later.