

Version 7.4 and higher
The messages overview (also referred to as ‘the messages queue’) by default shows all pending (=unsent) messages. Change the search criteria to also view the sent messages or to search for specific messages, appointments or orders.
From this list it is possible to view the content of a message, and if desired change it (if the message is not sent yet). A pending message can be sent right now or removed from the queue to prevent it from being sent. An already sent message can be sent again. Messages of type ‘letter’ can be downloaded and printed.
The messages overview
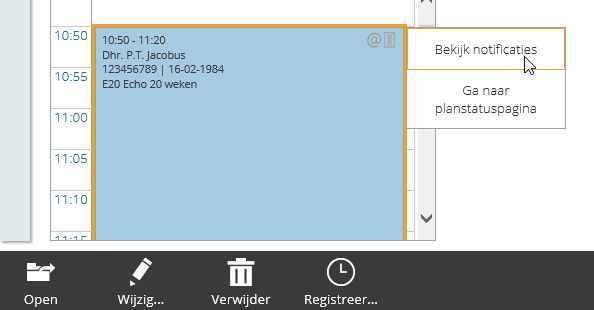
The messages overview can be opened from the ‘Notifications’ section in ‘Administration & setup’, but it is also possible to navigate to the messages overview by right-clicking a specific appointment on a session. In that case, the messages overview will on page load already be filtered so that it only shows messages that are related to the clicked appointment.
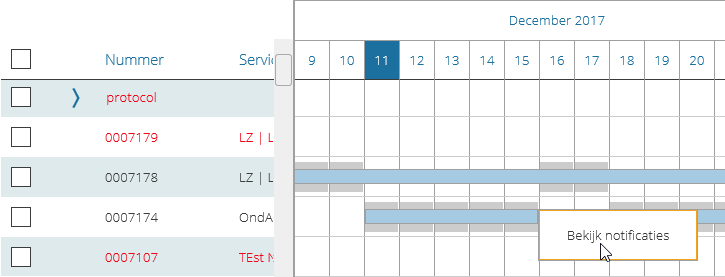
Version 7.7 and higher The messages queue can be opened with a right-click on a specific order-moment on the order overview. In that case the queue will also be filtered so that it only shows messages related to that order.
The table
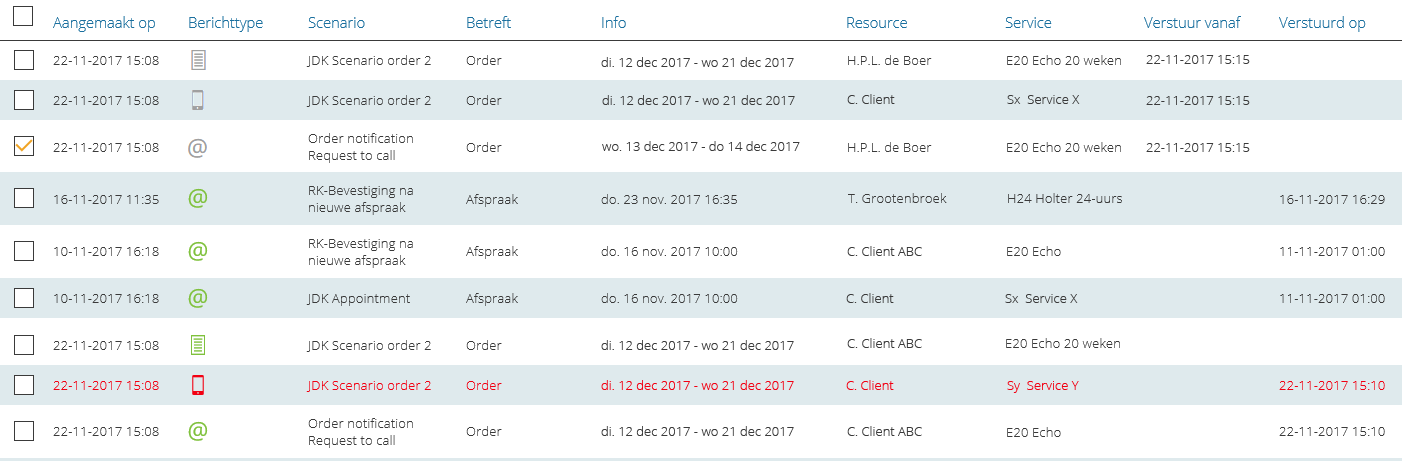
The overview table shows all notification messages, each message on a new row. For each message the most important details are shown: the date which the message was generated on, the message type, the scenario which the message was based on, whether it concerns an appointment message or an order message, information about the appointment date or order date, the client (resource) whom the message is made for, the service which the message is about, the date from which the message can be sent and the date which the message eventually was sent on.
The icons in the message type column indicate if it concerns an email, a letter or a text message. The color of the icon indicates if the message is already sent (green), pending (gray) or if the sending failed (red).
Search functionality
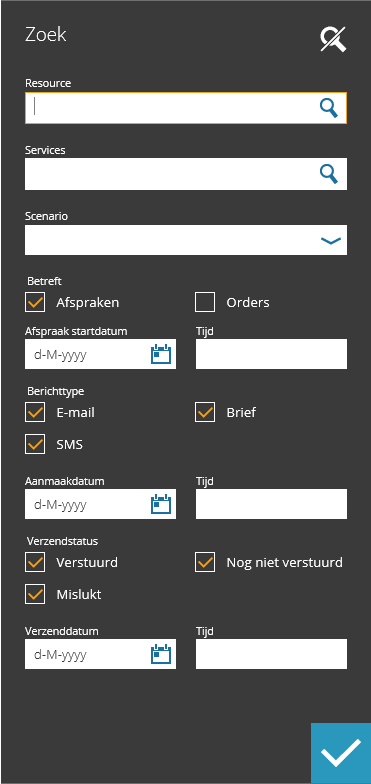
In the bottom right corner, click ‘Search’ to open the search panel. Here you can search for messages for a specific client (search with name or SSN), or a specific scenario or for specific service(s). It is also possible to view only appointment messages, view only order messages, or view both.
For appointment messages a start date and start time can be entered. Then only messages will be shown from appointments that start between 30 minutes before and 30 minutes after the entered time. If only a date is entered, then messages from all appointments that start on that day will be shown.
It is possible to enter a from-to period for order messages. Then only messages will be shown from orders that start in the entered period.
When a created date and time are entered, then only messages that were created between 30 minutes before and 30 minutes after the entered date + time will be shown. If only a date is entered, then all messages that were created on that date will be shown.
When a send date and time are entered, then only messages that were sent between 30 minutes before and 30 minutes after the entered date + time will be shown. If only a date is entered, then al messages that are sent on that date will be shown.
Actions
Several actions are available on the action bar on the messages overview. It depends on the items that are selected (one or multiple messages; sent or unsent messages) which actions are available.
Viewing and editing message content
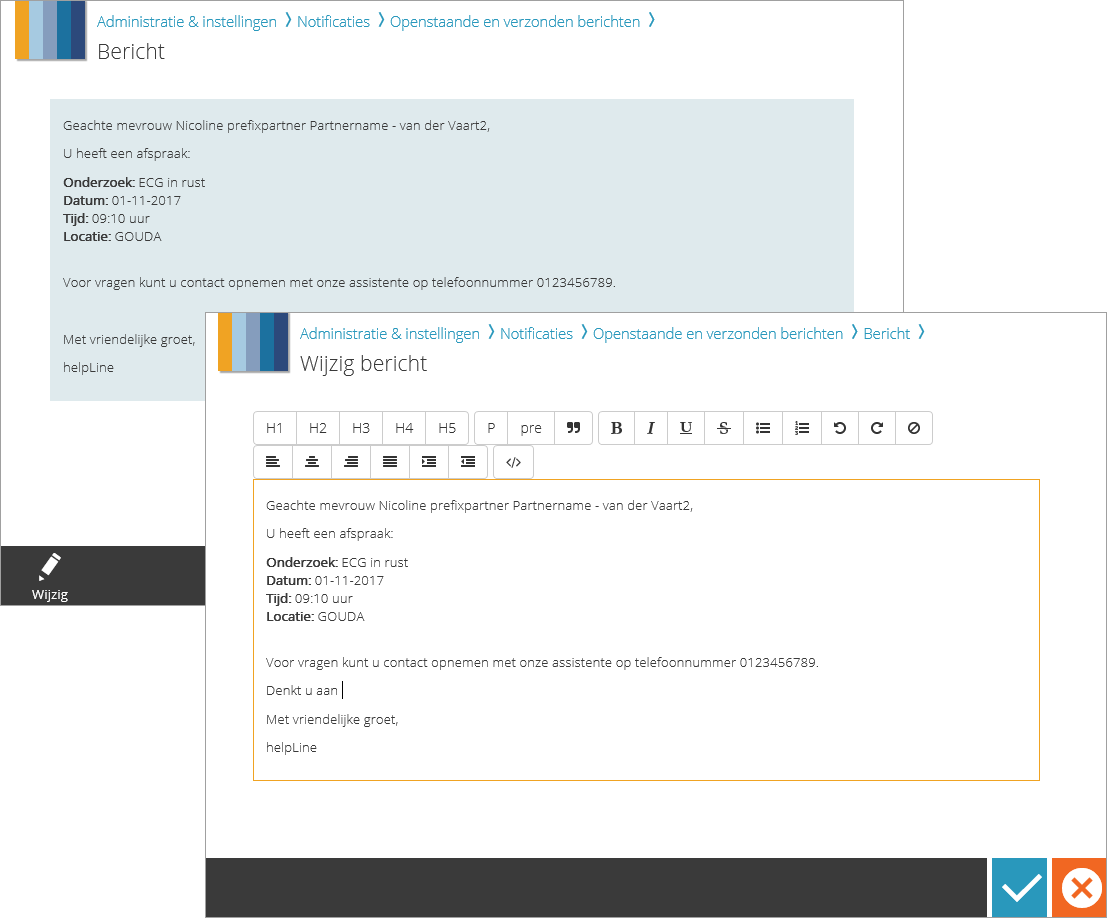
Select one message and click ‘Open’ on the action bar. The message will be shown as it was/will be sent. Click on  to go back to the overview.
If the message is not yet sent, it is possible to edit the message text. Click ‘Edit’, click in the message field and edit the text as desired. This can be useful for example when some specific agreements were made with the client, or when further explanation needs to be added.
Click on when the editing is finished. The edited message will be sent to the client when the ‘Not send until’ moment has arrived. Click  to undo the changes and keep the original message.
Sending now/again
Use the ‘Send’ button to immediately send one or multiple unsent messages. In doing so, the ‘Not send until’ time will be ignored. If a message is already sent, the ‘Send’ button can be used to send the message again. A copy of the original message will be made and sent directly.
Downloading or printing
Select one or multiple messages and click ‘Download’. The files are downloaded to the file location which was configured for the browser. Each message will be saved as a separate file with a name consisting of the client number, the client name, the start date of the appointment/order and the name of the scenario.
Print directly from the browser (manual method)
The ‘Print’ option merges all selected messages of type ‘letter’ into one file, in which each message starts on a new page. Any simultaneously selected e-mail or SMS messages will be ignored, and will not be part of the print file. In the print pop-up, choose a printer of your choice and click on ‘Print’.
This printing method is useful when small selections of letters have to be printed. With the search function, the necessary selection can be created. The entire selection can then be printed in one go using the ‘Print’ button.
Attention!
If you press the ‘Print’ button and nothing happens, your browser possibly blocks pop-ups. Allow the pop-up to continue.
Print from a central file location (automatic method)
You can also choose to print letters from a central file location. If this has been configured, then – after creating the notifications – they will be printed as PDF files, according to the sending moment defined in setting 21. The files are then downloaded to the central file location. From here, the letters (PDF files) can be sent automatically to the printer using a job.
Attention!
The finally printed result can be different between the two printing methods (manual or automatic). When printing or downloading manually (directly from the browser) a different mechanism is used then when printing via a central file location. So, it pays to test the different variants.
Also note that when printing directly from the browser, there may be differences between browsers.
Deleting unsent messages
One or multiple unsent messages can be deleted with the ‘Delete’ action. These messages will be removed from the overview and will never be sent.